

Key Takeaways
- Repair method depends on hole size - small, medium, and large damage each require a different approach.
- Joint compound (also called mud) is the core material in almost every drywall repair.
- Multiple thin coats of compound produce a smoother, more invisible result than one thick coat.
- Sanding between coats and priming before painting are essential steps most beginners skip.
- Holes larger than six inches or damage near electrical/plumbing lines should be assessed by a professional.
Start here
Understanding Drywall Damage
Gather supplies
Tools and Materials You'll Need
Practice first
Patching Small Holes (Under 1 Inch)
Level up
Repairing Medium Holes (1 to 6 Inches)
Know your limits
Tackling Larger Damage and When to Call a Pro
Complete the job
Finishing and Painting the Repair
Understanding Drywall Damage
Drywall - also called gypsum board or sheetrock - is the standard wall material in most US homes built after the 1950s. It consists of a gypsum plaster core sandwiched between paper facings. This construction makes it easy to finish and paint, but also relatively easy to dent, crack, or punch through.
Before picking up a tool, identify what you're dealing with. Damage generally falls into three categories:
- Small holes (under 1 inch): Nail holes, screw pops, and small anchor pull-outs.
- Medium holes (1 to 6 inches): Doorknob dents, accidental punctures, or holes left by removed fixtures.
- Large damage (over 6 inches): Sections that require a cut-out and a new piece of drywall.
Also look for signs that the damage isn't purely cosmetic. Staining, soft or spongy drywall, or mold growth suggest moisture behind the wall - a condition that requires professional attention before any patching begins. Similarly, any work near electrical wiring or plumbing lines should be approached with extra caution.
Joint compound
A plaster-like paste (often called "mud") used to fill, smooth, and finish drywall repairs. It shrinks as it dries, so multiple thin coats are typically needed.
Feathering
The technique of gradually thinning and spreading joint compound outward from a repair so the edges blend invisibly into the surrounding wall surface.
Drywall primer
A sealing coat applied to dried joint compound before painting. It prevents the porous compound from absorbing paint unevenly, which would leave a dull or flat-looking spot.
Mesh patch
A self-adhesive fiberglass mesh panel that covers a hole in drywall, giving joint compound a surface to grip so it doesn't fall through the gap.
Flashing
A visible dull or shiny spot on a painted wall where the paint absorbed differently - most often caused by painting over unsealed joint compound without primer.
Gypsum board
Another name for drywall. It's a panel made from a calcium sulfate (gypsum) core pressed between two layers of paper, used as the standard interior wall surface in most US homes.
Tools and Materials You'll Need
Having the right supplies on hand before you start saves unnecessary trips mid-project. For most beginner repairs you'll need:
- Joint compound (all-purpose or lightweight): The primary filling material for all but the tiniest holes.
- Putty knife or drywall knife: A 4-inch knife handles most small patches; a 6- or 8-inch knife helps feather larger areas.
- Self-adhesive mesh patch or patch kit: Used to bridge medium holes so compound has a surface to grip.
- Sandpaper: 120-grit for between coats, 150-grit for the final pass.
- Drywall primer: Applied before painting to seal the porous compound.
- Dust mask and safety glasses: Essential when sanding - drywall dust is fine and irritating.
For larger repairs you'll also need a drywall saw, a piece of replacement drywall, wood backing strips or a patch clip system, and drywall screws. Always wear a dust mask during sanding - this is not optional.
Buy a Little More Compound Than You Think You Need
Joint compound is inexpensive, and running out mid-project - especially once you've opened the container and it has begun to dry out - is a common beginner frustration. A small bucket goes further than you'd expect for minor repairs, but for multiple patches it's worth having a backup. Keep the lid sealed tightly after each use to prevent the surface from drying out.
Patching Small Holes (Under 1 Inch)
Nail holes and screw pops are the most common repairs in any home, and they're a great place to build confidence. The process is straightforward:
- Clean any loose paper or debris around the hole.
- Apply a small amount of spackling paste or lightweight joint compound with a putty knife, pressing it firmly into the hole.
- Scrape the surface flat and let it dry completely - it will shrink slightly as it dries.
- Apply a second thin coat, let dry, then sand lightly with 150-grit paper until flush.
- Wipe off dust, prime, and paint.
Resist the temptation to overfill in one pass. Compound shrinks as moisture evaporates, so thin layers build up more reliably than one thick glob that cracks as it dries.
Repairing Medium Holes (1 to 6 Inches)
Holes in this range need a backing material to give compound something to bond to. Self-adhesive mesh patch kits - available in common sizes - are the most beginner-friendly option. Here's how to use one:
- Clean and slightly enlarge any ragged edges so the patch lies flat.
- Center the self-adhesive mesh patch over the hole and press firmly.
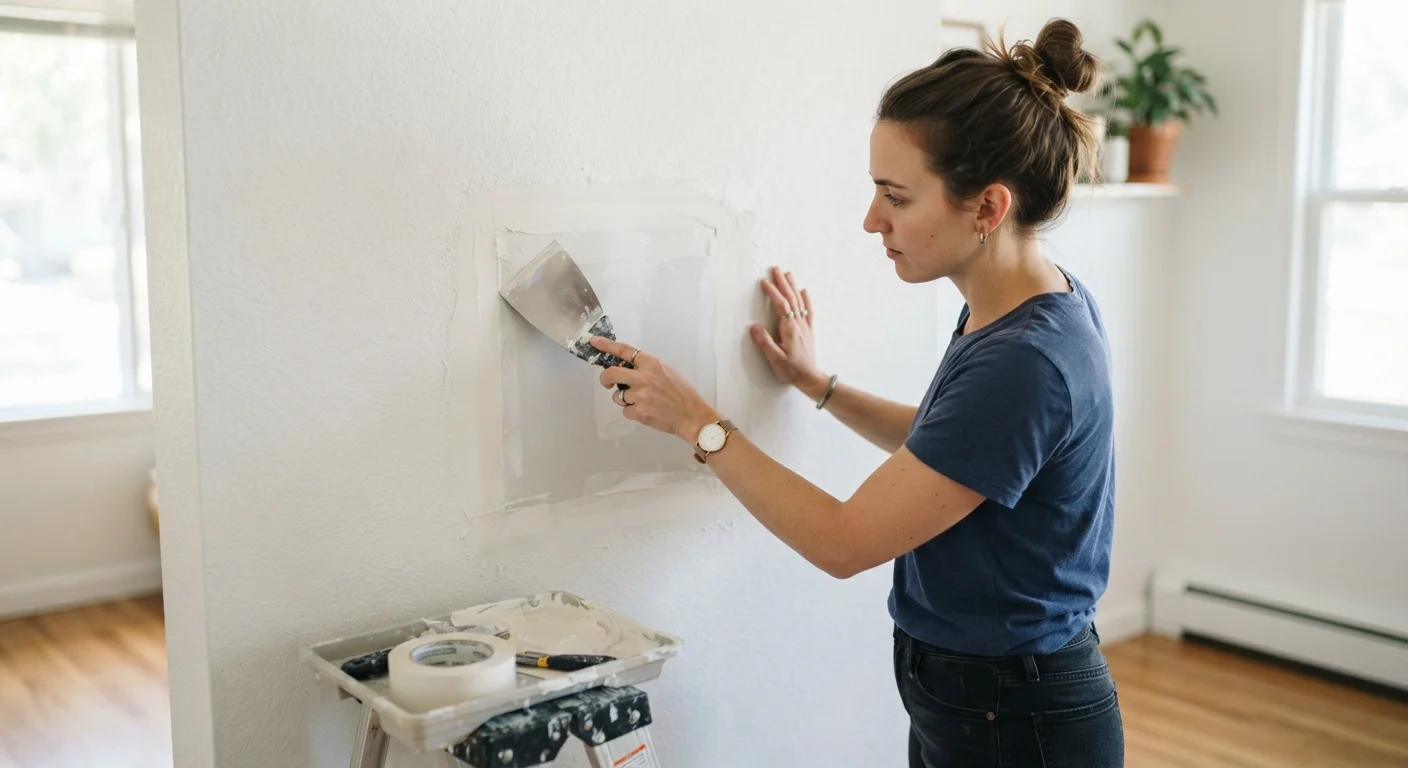
- Apply a thin first coat of all-purpose joint compound over the mesh, spreading it outward a few inches beyond the patch edges.
- Let dry fully (usually 24 hours), then sand lightly.
- Apply a second coat, feathering the edges wider - at least 6 to 8 inches from the hole's center.
- Repeat with a third coat if needed, feathering even wider for an invisible blend.
- Sand smooth, prime, and paint.
Feathering - gradually thinning the compound outward - is the skill that makes repairs disappear. The wider and thinner the edges, the flatter the final result. If your first attempt looks noticeable, it usually just needs another thin coat feathered a bit further out. After finishing the patch, you may notice uneven paint coverage nearby - our article on why painted walls look patchy explains how to address that.
Tackling Larger Damage and When to Call a Pro
Holes over six inches typically require cutting out a clean rectangle of damaged drywall and installing a new section. The challenge is that drywall must be fastened to something solid - usually wall studs or added wood backing strips - for a stable repair.
The general process involves:
- Cutting a clean square or rectangle around the damaged area using a drywall saw.
- Installing horizontal wood backing strips inside the wall cavity so the patch has edges to screw into.
- Cutting a new piece of drywall to fit the opening precisely.
- Securing it with drywall screws, then taping all seams with paper tape and joint compound.
- Applying multiple coats of compound with feathering, then sanding, priming, and painting.
Don't Cut Into Walls Without Checking First
Before using a drywall saw on any wall, verify there are no electrical wires, plumbing pipes, or gas lines behind the area you're cutting. Use a stud finder with AC detection capability, and proceed slowly. Cutting into a live wire or pipe is a serious safety hazard. When in doubt, consult a licensed electrician or plumber before proceeding.
Know when to stop and call a licensed contractor. If the damage reveals water staining, mold, insulation problems, or is located near electrical panels, outlets, or plumbing lines, professional assessment is essential. The same applies to any work that might require permits - check with your local building department if you're unsure. If you're refreshing a bathroom, our guide on what bathroom work requires a licensed trade is a helpful reference for understanding where DIY ends and professional work begins.
Finishing and Painting the Repair
A well-executed patch can still stand out if the finish steps are rushed. Follow these final steps for a result that blends in:
- Final sanding: Use 150-grit paper in a circular motion, then finish with light linear strokes to avoid swirl marks. Run your hand over the surface - it should feel completely flush with the surrounding wall.
- Dust removal: Wipe down the entire area with a slightly damp cloth and let it dry before priming.
- Prime the patch: Apply drywall primer to the repaired area and a few inches around it. This step seals the porous compound and prevents the paint from soaking in unevenly - a problem called flashing.
- Paint: Apply your wall paint in the same technique used on the rest of the wall. Two coats are usually needed for a match.
Even with careful color matching, a freshly painted patch can sometimes look slightly different until the paint fully cures and evens out. If you notice persistent unevenness after painting, our guide on patchy paint walks through the most common causes and fixes. With practice, drywall patching becomes one of the most satisfying and cost-effective home repairs you can do yourself.